What I learned taking an antique upright piano apart to clean and restore the inside…
Step 2: Removing Keyboard for Cleaning
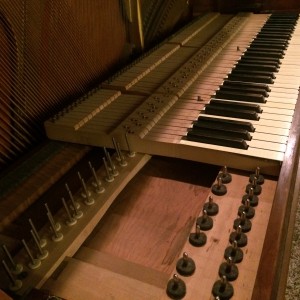
With the action out of the way, I need to take off all 88 keys. The keys themselves need to be cleaned as well as the space in the piano box underneath the keys. Each key rides on two steel pins with felt washers that creates the rocking action of an acoustic piano. These keys are basically wooden levers that trips a Rube Goldberg-like contraption that eventually swings a felt-covered mallet at the proper string.
Removing the Keys
To get to the keys, I removed the two wooden side pieces that hold the music desk, the fallboard (the part that slides forward to cover the keys, and a thin wood spacer that sits between the keys and the fallboard. (Note: According to Sprunger, its called a fallboard because it wants to fall forward onto your hands…still verifying this one.) Removing all of this was very easy and quick. I used a flathead screwdriver to remove the few large wood screws that held it all in place. Once I took the vertical side brackets off, the fallboard easily slide forward and off two metal rails. I just sat all of this to the side and with that, I am looking down at the exposed keyboard.
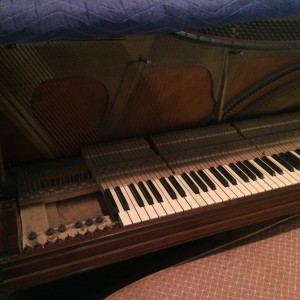
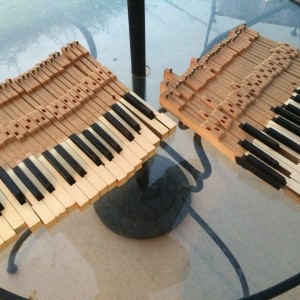
I carefully removed the keys in order and placed them back in order on an outside table for later cleaning. From the outside, piano keys all look basically the same, but each key is cut at a very specific angle to fit precisely into the action. Each key has to be kept and placed in its exact position; you don’t want to get these out of order.
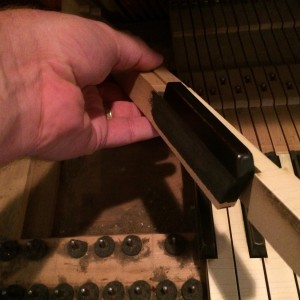
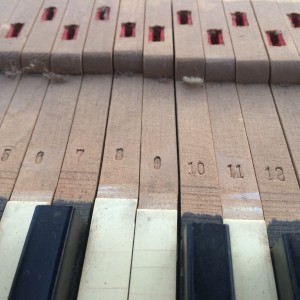
Turns out each key is stamped with a number from 1 to 89 (88 keys). In the photo below, you can see the numbers. Also notice the slots midway up the key with the red felt lining. This felt bushing sits on top of a brass post in the balance rail. That’s what gives the key its rocking action for lifting the hammer assembly.
Cleaning the Keys
With all of the keys out, I took them one handful at a time and, using the shop vac again, carefully blew the dust off the keys making sure to get the holes in the underside cleaned out. I had to also make sure to not blow out any of the felt bushings, which I managed to avoid doing. I then took warm water and a soft rag and cleaned the playing ends of each key off. There was a light layer of accumulated grime and grease. I observed that the black keys on this piano are simply stained wood. Some of the black keys are showing a little wear, so in time, it would be easy come in, lightly sand them and re-stain them, and put a light coat of lacquer or varnish to restore the original look. The white keys here show horizontal crack lines in the ivory. I rather like the aged, vintage look of these keys. As long as the ivory tops stay intact and are smooth, I’ll leave them alone. But I could come in and replace the white surfaces later by removing the old tops and gluing new ones down.
Dusting under the Keyboard
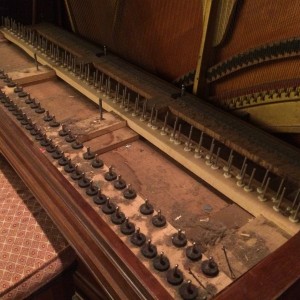
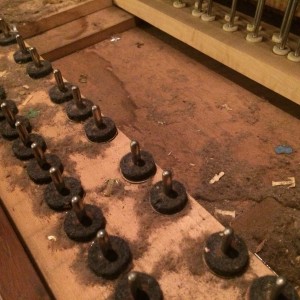
With the keys all taken care of, my last task here was to vacuum out the case under the keys. I had to be very careful to not accidentally suck up any of the felt washers that sit on the 176 steel pins in the case. But taking my time and keeping my hand over the posts as I went prevented any unwanted vacuum abductions.
Just as David Sprunger said, the board was very dirty. But a good cleaning made a real difference! Along with the fistfuls of dirt, I found pennies, markers, stickers, stars, bobby pins, and paper trash all throughout. I briefly imagined finding a priceless vintage coin down in the bottom and being able to call the owner back and return it to him, but no such luck…
With the board and keys cleaned out, the final step was simply to reverse the process and reinsert the keys back in the piano. This was very easy to do but I just took my time to carefully get the two pins lined up on each key and make sure it moved freely before going to the next one.
With the newly cleaned keys back in the nice, clean board, I don’t have to worry about what all that dirt and dust is doing to the metal pins and felt bushings.
Up next, Part 4: cleaning and inspecting the lower part of the case and the pedals.


